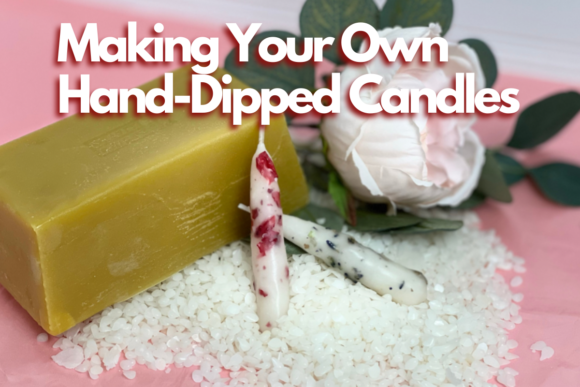
How to Make Your Own Hand-Dipped Candles and Why You Might Want To
Making your own hand-dipped candles is a craft that blends simplicity with creativity. Unlike mass-produced candles found in stores, hand-dipped candles are made by repeatedly dipping a wick into melted wax until it builds up into the desired shape and size. This traditional method allows for customization and personal expression, making each candle unique. Whether you're crafting them for home décor, gifting, or selling at local markets, understanding how to make your own hand-dipped candles can open up a world of possibilities.
The Process of Making Hand-Dipped Candles
To begin, gather materials such as beeswax, soy wax, or paraffin wax, along with cotton wicks, a double boiler, and a long-handled spoon. The process involves melting the wax, trimming the wick to length, and then carefully dipping it into the wax several times, allowing each layer to cool before the next dip. Each pass adds thickness, and once the candle reaches the desired size, it’s trimmed, cured, and ready for use or decoration.
This technique is distinct from other candle-making methods like container candles, which require molds, or poured pillar candles, which need more equipment and precise measurements. Hand-dipping relies on patience and repetition rather than complex tools or formulas. It's ideal for beginners who want to explore candle-making without a steep learning curve.
Strengths of Hand-Dipped Candles
- Customization: You have full control over color, scent, and design. Add essential oils, herbs, or natural dyes to create a personalized product.
- Minimal Equipment: Compared to other candle-making techniques, the tools required are simple and affordable, making it accessible for most people.
- Rustic Aesthetic: The layered appearance gives hand-dipped candles a charming, homemade look that fits well in farmhouse, bohemian, or vintage interiors.
- Slow-Burning: Due to their thick layers, these candles often burn longer than store-bought ones, especially when using beeswax or soy wax.
Potential Tradeoffs and Limitations
- Time-Consuming: Building up each candle takes multiple dips and cooling periods, which can add hours to the process, depending on how many you're making.
- Size Constraints: It's challenging to create large or intricate shapes using this method, limiting its suitability for certain decorative styles.
- Consistency Required: Achieving uniform results across multiple candles demands practice and attention to detail, especially if you plan to sell them commercially.
- Storage Space: The curing time (usually 48–72 hours) means you’ll need room to let the candles harden between dips.
Comparing Hand-Dipped Candles to Other Candle-Making Methods
Hand-dipped candles offer a different experience compared to other popular candle-making approaches. Here’s how they stack up against some alternatives:
Container Candles
Container candles are typically made by melting wax and pouring it into a jar or votive holder. While this method is faster and requires less precision, it lacks the visual appeal of hand-dipped candles. Container candles are great for beginners who want to experiment with fragrances and colors but may not appreciate the tactile and aesthetic value of a hand-dipped piece.
Poured Pillar Candles
These candles are made by melting wax and pouring it into a mold. They tend to be larger and more uniform, which is excellent for commercial production. However, they require specialized tools and more space for cooling and unmolding. If your goal is to create small batches of uniquely shaped candles, hand-dipping might be a better fit.
Roll Candles
Roll candles are created by rolling wax sheets around a wick. This method is efficient for producing large quantities quickly. Yet, it doesn’t offer the same level of craftsmanship or individuality as hand-dipping. Roll candles are commonly used in religious or ceremonial settings but lack the artistic freedom of the dipped variety.
When to Choose Hand-Dipped Candles
Making your own hand-dipped candles is particularly well-suited for specific situations:
- Personalized Gifts: These candles make thoughtful, handmade gifts for weddings, birthdays, or holidays. You can customize them with names, dates, or scents meaningful to the recipient.
- Small Business Ventures: For those looking to start a niche candle business, hand-dipped candles stand out due to their charm and uniqueness. They’re perfect for boutique shops or pop-up markets.
- Home Décor Projects: The rustic look of hand-dipped candles complements farmhouse kitchens, cozy living rooms, and outdoor patios. Their simplicity enhances any space with warmth and character.
- Learning the Craft: If you're new to candle-making, hand-dipping offers an easy entry point. It teaches fundamental skills like wax handling, wick preparation, and scent blending without overwhelming complexity.
When Alternatives Might Be Better
While hand-dipping has many benefits, it isn't always the best choice. Consider these scenarios where another candle-making style could be more appropriate:
- Large Production Needs: If you're aiming to produce hundreds of candles per week, methods like roll or poured pillar candles will be more efficient.
- Commercial Uniformity: Businesses that rely on consistent branding or packaging may prefer machine-made or container candles for predictable sizing and finish.
- Modern Design Preferences: For contemporary or minimalist aesthetics, molded candles with clean lines or embedded designs may suit better than the organic, layered look of dipped candles.
- Quick Turnaround: If you need candles in a short timeframe, hand-dipping may not be practical due to the multiple steps involved.
Realistic Examples and Use Cases
Imagine you're preparing for a fall market. You decide to make your own hand-dipped candles infused with cinnamon and clove essential oils. After a few dips and careful trimming, you attach twine to the top so customers can hang them as decorations. These candles become a hit for their warm scent and rustic appearance.
Or perhaps you’re hosting a rustic-themed wedding. Instead of purchasing generic taper candles, you opt to make your own hand-dipped candles using natural beeswax and dipped them in honey-colored dye. You even etch the couple's initials onto the surface with a heated tool. The result is a beautiful, custom touch that aligns perfectly with the event’s theme.
Another example: you're starting a small artisanal shop and want to offer eco-friendly products. By using soy wax and recycled jars, you can pair hand-dipped candles with container-style options, giving customers a range of sustainable choices while showcasing your craftsmanship.
Key Decision Factors When Choosing a Candle-Making Method
Selecting the right approach depends on several factors. Here are a few to consider:
- Time Investment: How much time do you have available? Hand-dipping is slower but rewarding for those who enjoy a hands-on process.
- Desired Outcome: Are you after a decorative item, a functional candle, or a commercial product? Each goal may dictate the best method.
- Budget: What are your costs for supplies and equipment? Hand-dipping uses minimal tools, whereas other methods may require more expensive gear.
- Audience Appeal: Who are you making the candles for? Some buyers prefer modern designs, while others seek the charm of handmade items.
Enhancing Your Hand-Dipped Candles
Once you've mastered the basics, you can elevate your creations through various enhancements:
- Additives: Incorporate dried flowers, citrus zest, or spices like nutmeg for a textured, aromatic finish.
- Dye Choices: Use natural pigments or candle-safe dyes to match your home décor or seasonal themes.
- Scent Blending: Experiment with essential oil combinations to create signature scents tailored to your preferences or audience needs.
- Finishing Touches: Apply a light coat of stearic acid for a glossy sheen or use a metal collar to maintain straight sides during dipping.
Getting Started with Hand-Dipped Candles
If you're intrigued by the idea of making your own hand-dipped candles, here’s a quick guide to help you begin:
- Choose your wax type based on availability, scent retention, and burn quality.
- Prepare your wicks by ensuring they’re tightly twisted and cut to the correct length.
- Set up a safe workspace with good ventilation and heat-resistant surfaces.
- Melt the wax using a double boiler and monitor the temperature closely.
- Dip the wick slowly and evenly, rotating it slightly to build a smooth shape.
- Allow the wax to cool completely between dips before repeating the process.
- Once complete, trim the wick and cure the candle for a day or two to improve burn performance.
With just a little practice, you’ll notice improvements in consistency and appearance. Many artisans recommend starting with beeswax because it’s easier to work with and has a natural golden hue, though soy wax is also a popular choice for its eco-friendliness and ability to hold strong scents.
Final Thoughts on Making Your Own Hand-Dipped Candles
Making your own hand-dipped candles is a fulfilling hobby and a viable small business option for those who value tradition, craftsmanship, and personalization. The method is straightforward yet versatile, allowing for creative experimentation and adaptation to different needs. While it may not be the fastest or most scalable approach, it offers unmatched satisfaction and the opportunity to create something truly one-of-a-kind.
If you're looking for speed, efficiency, or commercial scalability, alternative candle-making methods may serve you better. But if you're drawn to the slow, deliberate process of building a candle layer by layer, hand-dipping is an excellent choice. Evaluate your goals, resources, and preferences to determine whether Making Your Own Hand-Dipped Candles aligns with what you're trying to achieve.